Wednesday, 17 December 2014

PS1 CANNOT BE LOADED BECAUSE RUNNING SCRIPTS IS DISABLED ON THIS SYSTEM

If you get the error below:
File C:\Windows\System32\Users-Last-Logon.ps1 cannot be loaded because running scripts is disabled on this
system. For more information, see about_Execution_Policies at http://go.microsoft.com/fwlink/?LinkID=135170.
    + CategoryInfo          : SecurityError: (:) [], ParentContainsErrorRecordException
    + FullyQualifiedErrorId : UnauthorizedAccess
You can set the execution policy by typing this into your powershell window as below:

Set-ExecutionPolicy RemoteSigned

Tuesday, 25 November 2014

Thursday, 20 November 2014

ADDING EMAIL ADDRESSES TO SAFE SENDERS LIST FOR ALL USERS OFFICE 365

1. Connect Windows PowerShell to Exchange Online http://technet.microsoft.com/en-us/library/jj984289(v=exchg.150).aspx
2. Prepare a CSV file to list the users whom you want to change, and this file maybe  contain the user's alias and email address in your organization , and then store it in local disk (for example, F:\UserList.csv ).
For example:
Identity, EmailAddress
3. Run the command below to bulk update the safer sender list of all users of your organization:
Import-Csv "F:\UserList.csv"  | foreach { Set-MailboxJunkEmailConfiguration -Identity  $_.Identity -TrustedSendersAndDomains  @{Add=news@domain.com} }

EXPORT LIST OF USER ACCOUNTS FROM OFFICE 365

1.   Download the MSOL Module for Windows PowerShell and connect to the Office 365 service. http://technet.microsoft.com/en-us/library/hh974317.aspx
2.   Run the following cmdlet: 
Get-MSOLUser | select displayname,userprincipalname | Export-CSV userlist.csv

Wednesday, 19 November 2014

MISSING USER ACCOUNT IN GLOBAL ADDRESS LIST (GAL)

The user account may configured correctly on the Exchange and AD, based on my troubleshooting.  I just remove the Global Address List (GAL) attribute on the ADSIEDIT and re-add again into the GAL.  After that the problem resolved with the user appeared on the GAL.

Steps 1: Go to CMD and run ADSIEDIT.MSC.

Steps 2: On the ADSIEDIT console, expand the Domain > DC > and select CN=Users
         

Steps 3: On the right pane, Select the problematic user, right click and choose Properties.

Steps 4: On the user Properties, search and edit the ShowInAddressBook attribute.

Steps 5: Select the CN=Default Global Address List,CN=All Global Address Lists,CN=Address Lists Container,CN=First Organization,CN=Microsoft Exchange,CN=Services,CN=Configuration,DC=tez,DC=net copy and paste to notepad.

Steps 6: After that click Remove and click OK twice.

Steps 7: Right click and select Properties on the same user and edit the ShowInAddressBook attribute.

Steps 8: Enter the CN=Default Global Address List,CN=All Global Address Lists,CN=Address Lists Container,CN=First Organization,CN=Microsoft Exchange,CN=Services,CN=Configuration,DC=tez,DC=net click Add and OK twice.

Steps 9: Update the GAL on exchange server with run the Exchange PowerShell command as below;
Update-GlobalAddressList -identity "Default Global Address List" -DomainController "Domain_Controller_PDC_Name" and enter the command to update GAL.

Steps 10: Manually download the GAL on the MS Outlook and the problem resolved.

Wednesday, 5 November 2014

SIMPLE STEPS DEBUGGING MEMORY.DMP USING DEBUGGING TOOLS FOR WINDOWS

  •     Obtain and install the debugging tools.  The links do change over time, but the following link is currently an exhaustive page which includes Windows Server 2012 and Windows 8 Consumer debugger tools, Windows 7, Vista, XP and Windows Server 2003.http://msdn.microsoft.com/en-us/windows/hardware/hh852365
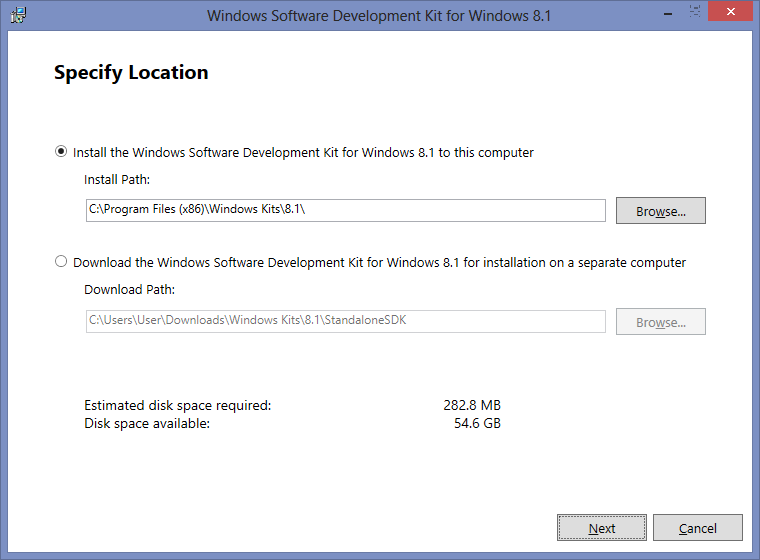
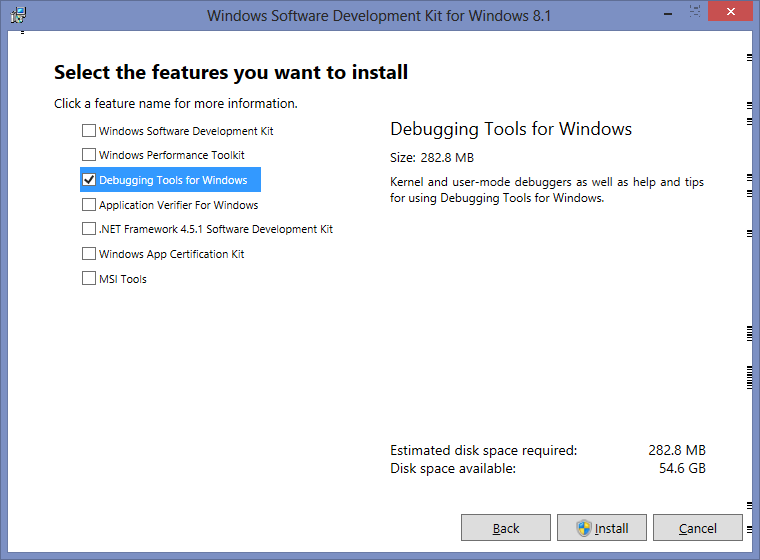
  •     All you need to install is the “Install Debugging Tools for Windows as a Standalone Component (from Windows SDK)” and during the install only select "Debugging Tools for Windows".  Everything else is used for more advanced troubleshooting or development, and isn’t needed here.  Today I followed the link to “Install Debugging Tools for Windows as a Standalone Component (from Windows SDK)” although for a different OS you may need to follow a different link. Please follow steps below.


  • From an elevated command prompt navigate to the debugging folder. For me with the latest tools on Windows Server 2012 it was at C:\Program Files (x86)\Windows Kits\8.0\Debuggers\x64\.  You can specify the path during the install.

  • Save memory.dmp same location with path C:\Program Files (x86)\Windows Kits\8.1\Debuggers\x64
  • At cmd type kd -z MEMORY.DMP
        
      
  • At cmd type .logopen c:\debuglog.txt
     

  • At cmd type .sympath srv*c:\symbols*http://msdl.microsoft.com/download/symbols
  •  At cmd type .reload;!analyze -v;r;kv;lmnt;.logclose;q
  • Wait until log successfully generated as shown below;
 
  • Review the results by opening c:\debuglog.txt in your favourite text editor. For example using trace32, as you can see VTrack.sys was triggered bugcheck and cause the server unexpected shutdown.

PREVENT FROM POODAL ATTACK ON SSL 3.0

To prevent from POODLE attack you may follow the instructions from Microsoft as below;
https://technet.microsoft.com/en-us/library/security/3009008.aspx

Reference for POODLE attack:
https://threatpost.com/new-poodle-ssl-3-0-attack-exploits-protocol-fallback-issue/108844

ADMINISTRATIVE TEMPLATES ENCOUNTER AN ERROR WHILE PARSING

If you encounter this Warning after import the Administrative Template;

Warning

Administrative Templates

Encounter an error while parsing.  
Expected one of the following possible element.....


Solutions
If the error is showing parsing issues with a particular ADMX/ADML file, you can simply remove that from the PolicyDefinitions folder. For example, the terminalserver-Server.ADML file is specific to Server 2008-R2 and you probably don't need it. 

Monday, 3 November 2014

PERFORM ACTIVE DIRECTORY METADATA CLEAN-UP

1.   Go to Start > Programs > Accessories, and then click Command Prompt.
2.   On command prompt, type Ntdsutil and press Enter.
3.   At the Ntdsutil prompt, type Metadata Cleanup and press Enter.
4.   At the Metadata Cleanup prompt type Connections and press Enter.
5.   At the Server Connections prompt, type Connect To Server {Server_Name} and press Enter.
6.   At the Server Connections prompt, type Quit and press Enter.
7.   At the Metadata Cleanup prompt, type Select Operation Target and press Enter.
8.   At the Selected Operations Target prompt, type List Domains and press Enter. This list all the domains in the forest are listed with a number associated to each.
9.   At the Select Operations Target prompt, type Select Domain {Number}, where number is the failed domain controller, and press Enter.
10. At the Select Operations Target prompt, type List Sites and press Enter. This list all the sites in the forest are listed with a number assigned to each.
11. At the Select Operations Target prompt, type Select Site {Number}, where number is the site containing the failed domain controller, and press Enter.
12.  At the Select Operations Target prompt, type List Servers In Site and press Enter.
13.  At the Select Operations Target prompt, type Select Server {Number}, where number is the failed domain controller, and press Enter.
14.  At the Select Operations Target prompt, type Quit and press Enter.
15.  At the Metadata Cleanup prompt, type Remove Selected Server and press Enter.
16.  You will receive a warning message. Read it, and if you agree, click Yes to confirm removal of the server.
17.  Type Quit at each prompt to exit Ntdsutil.

HOW TO EXCLUDE SEVERAL PC FROM SCCM APPLICATION DEPLOYMENT.

  1. You need to create new "exclude collection" and dump all the PCs that you want to exclude.
  2. After finish created the "exclude collection".  Select the existing application deployment collection and right click choose Properties.
  3. On the group Properties, select Membership Rules
  4. On the Membership Rules, click Add Rule and select Exclude Collections.
  5. Select the exclude collection and click Ok.
  6. On the membership rules, you will see the exclusion details.  Click Apply and Ok to proceed.
  7. Done.
Notes: All the changes settings above are performed on the SCCM 2012 r2 console > Assets and Compliance > Devices.

Friday, 31 October 2014

EXCHANGE SERVER BUILD NUMBERS AND RELEASE DATES

To view the Exchange build number for the version of Exchange 2013 using Exchange Management Shell.

Get-ExchangeServer | Format-List Name, Edition, AdminDisplayVersion

To verify and check the version, you may refer to URL below;

IP SUBNET CALCULATOR ONLINE

IP Subnet Calculator Online

http://www.subnet-calculator.com/subnet.php?net_class=A


Thursday, 30 October 2014

THE GUI METADATA CLEANUP UTILITY USING VBS SCRIPT

Useful tools for AD metadata clean-up and it's easy to use. 

Refer to URL Below;

https://gallery.technet.microsoft.com/scriptcenter/d31f091f-2642-4ede-9f97-0e1cc4d577f3

Verified on the following platforms


Windows Server 2012 No
Windows Server 2008 R2 Yes
Windows Server 2008  Yes
Windows Server 2003 Yes
Windows 8 No
Windows 7  No
Windows Vista No
Windows XP Yes
Windows 2000 Yes

FORCE DEMOTE DOMAIN CONTROLLER SERVER

1.  Login to the correct server (server to demote) and open the command prompt.  With go to Startmenu>Run> type CMD.
2.  At a command prompt, type the following command dcpromo /forceremoval and then press ENTER.
3.  On the Active Directory Domain Services Installation Wizard, click Yes.
4.  On the Welcome to the Active Directory Domain Services Installation Wizard page, click Next.
5.  On the Force the Removal of Active Directory Domain Services page, click Next.
6.  On the Administrator Password page, type and confirm a secure password for the local Administrator account, and then click Next.
7.  On the Summary page, review your selections.  Click Next to remove AD DS.
8.  After finished, reboot the server.